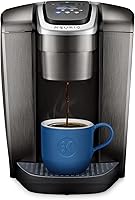
Why Is My Keurig Not Brewing?
A Keurig coffee maker that is not brewing may have a power, water, pod, needle, or mineral buildup problem. Check those in order, and choose a cleaning product only after matching the symptom and brewer model.
On this page (8 sections)
- Why is my Keurig coffee maker not brewing?
- What should I check before cleaning the brewer?
- Can a clogged needle stop a Keurig from brewing?
- Could mineral buildup be blocking the water flow?
- Which cleaning product should you buy?
- What if my Keurig still won't brew after cleaning?
- How can you keep a Keurig brewing normally?
- What should you do next if your Keurig coffee maker is not brewing?
A Keurig coffee maker that is not brewing needs power, water, and pod checks first, followed by needle cleaning or descaling when the symptoms point there. Don't buy a cleaner until you know which job it needs to do.
A needle tool clears grounds from a specific area, while descaler removes mineral deposits inside the water path. Neither can repair a failed pump, damaged wiring, or a leaking internal part.
Why is my Keurig coffee maker not brewing?
The symptom tells you where to start, though it doesn't prove which part is at fault. Notice whether the brewer has power, draws water, or stops after dispensing a little.
- No lights or display: Check the plug, outlet, and power button.
- Lights on, but brewing won't start: Check the reservoir, water level, handle closure, and any displayed message.
- Only a partial cup: Check the selected cup size, then look for grounds or mineral buildup.
- Water flows without a pod but not with one: Inspect pod placement and follow the needle-cleaning instructions.
- Leaking or smelling burned: Stop using the brewer and seek support.
Gradually slower flow makes mineral buildup worth checking. A problem that begins just after refilling the tank or changing a pod makes those recent steps worth checking first.
Don't keep pressing Brew to push through a blockage. Repeated attempts won't tell you whether the cause is grounds, scale, or a fault that needs service.
What should I check before cleaning the brewer?
Check power, water, and pod placement before taking parts out. A tank that isn't seated correctly or a handle that hasn't closed fully can interrupt brewing.
- Confirm the brewer is plugged into a working outlet and switched on.
- Read any message or indicator light, then check its meaning in your model's manual.
- Fill the reservoir within its marked limits and reseat it if it's removable.
- Once the brewer has stopped and cooled, check that the pod sits correctly and the handle closes without force.
- Place a large enough cup under the spout, select the intended size, and try one normal cycle.
For a model that takes fresh water for each brew, follow its measured-fill instructions rather than treating it like a removable-tank machine. Don't pour extra water into a full brewer to try to increase pressure.
If the sequence is unfamiliar, see how to use a Keurig coffee maker. Leave the outer casing closed; these checks don't require access to wiring or internal plumbing.
What if your Keurig won't brew with a pod?
Compare pod placement with a permitted water-only rinse before assuming the whole brewer is blocked. Use the rinse procedure in your manual, since controls and preparation vary by model.
If water flows normally without a pod, let the brewer cool and inspect the holder for residue or a misplaced pod. Avoid stacking pods, reusing a damaged pod, or forcing the handle shut.
A water-only cycle that also produces little or no flow points toward a broader water-flow issue. It still doesn't identify the cause by itself.
Can a clogged needle stop a Keurig from brewing?
Grounds in an entrance or exit needle can restrict flow, leaving you with a partial cup or no coffee. Unplug the brewer and let it cool before cleaning around these sharp parts.
Remove and rinse the pod holder only as your manual directs. Don't push objects deep into openings or use force on a part that resists removal.
Choose this tool if you have a Keurig 2.0 and need to clear a clogged needle. It includes an instruction manual, so read that alongside your brewer's care directions before use.
Skip it for every other Keurig model and for other coffee-maker brands. Also skip it when your machine has no power or leaks: this tool addresses clogged needles only.
Confirm the model before ordering, rather than choosing by the brewer's shape or color. Our guide to how to clean a Keurig coffee maker explains how needle care fits into the wider cleaning routine.
After reassembling the removable parts, follow the prescribed rinse procedure. Check that flow has returned before inserting another coffee pod.
Could mineral buildup be blocking the water flow?
Mineral deposits can restrict the water path, making descaling useful when flow has slowed and basic cleaning hasn't helped. An overdue maintenance cycle or a descale alert adds a reason to check your model's instructions.
Needle cleaning and descaling solve different problems. Rinsing grounds from the pod holder won't remove deposits deeper inside the brewer.
Choose the standalone solution when mineral removal is the task you need. It's the simpler choice if you already have other care supplies or don't need filter refills.
Skip it as a first response to a dead display, loose reservoir, or poorly placed pod. It also won't physically clear grounds trapped in a needle.
Keurig recommends descaling every 3 months or as needed, with more frequent care possible when water has higher mineral content. Follow the brewer's directions for amounts, cycle selection, waiting periods, and fresh-water rinses.
Set aside enough time to finish the whole process and use a container large enough for each discharge. Don't leave a coffee pod in place, mix cleaners, or assume one rinse completes every model's procedure.
For the full sequence, see how to descale a Keurig coffee maker. If no water moves through the machine, ask support how to proceed before adding more solution.
Choose the care kit when you need several maintenance supplies together. Its rinse pods help rinse residue and oils from the pod holder and reduce flavor carry-over between drinks.
Skip the bundle if you only need descaler or still have unused supplies. K-Mini and K-Mini Plus brewers don't use water-filter handles, so those owners won't benefit from the included filter refills.
Rinse pods are used like a regular K-Cup pod, but they don't replace descaling or manual needle care. For compatible filters, follow the soak, rinse, and installation directions and confirm that the cartridge is seated correctly.
Which cleaning product should you buy?
Match the product to the task, then confirm compatibility. Buying all 3 isn't necessary, and the care kit already includes descaling solution.
| Your situation | Best fit | What to check first |
|---|---|---|
| Grounds may be blocking a Keurig 2.0 needle | Keurig Needle Cleaning Tool | Confirm the brewer is a 2.0 |
| Mineral removal is overdue or indicated | Keurig Descaling Solution | Check that the brewer can run the required process |
| You need descaler, rinse pods, and filter refills | Keurig 3-Month Brewer Care Kit | Confirm your brewer uses a filter handle |
| No power, leaking, or a burning smell | Support rather than cleaning supplies | Stop using the machine |
Keep taste problems separate from flow problems. Flavor carry-over can make rinse pods useful even when the brewer dispenses normally, while a blocked water path calls for a different check.
What if my Keurig still won't brew after cleaning?
Contact Keurig support when the basic checks and prescribed cleaning don't restore flow. Tell them the model, displayed messages, whether water moves, and which care steps you've completed.
Don't force the handle, pry off fixed parts, or run cycles without the required water. If water is escaping, disconnect power only when you can do so without touching water or a wet plug or outlet.
For a K-Duo, use our guide to Keurig K-Duo problems to focus on the brewing function that has failed. A problem on one side deserves the instructions for that side.
If service leaves you considering replacement, compare your daily cup needs in our home coffee maker guide before choosing another machine. Decide whether you still want individual pods or would use a full pot more often.
How can you keep a Keurig brewing normally?
Clean residue and remove mineral buildup as separate care tasks. Keep a simple record of descaling dates so a slow cup doesn't become your only reminder.
Empty used pods after brewing, clean removable parts as directed, and keep the reservoir clean. Don't treat a water-filter change as a substitute for descaling.
The Keurig cleaning guide covers routine care, while the descaling guide explains mineral removal. Follow your manual when its instructions differ from a general guide.
What should you do next if your Keurig coffee maker is not brewing?
Choose the next step from the symptom and model. Use the needle tool for a clogged Keurig 2.0 needle, standalone descaler for mineral removal, or the kit when you'll use its extra supplies.
For a Keurig coffee maker that is not brewing after those checks, stop buying cleaners and contact Keurig support. Have your model details and notes ready so the next step addresses the remaining fault.
Frequently asked questions
Why is my Keurig turning on but not brewing?
A Keurig that turns on but won't brew may have a low water supply, a poorly seated reservoir, a pod-placement problem, or a blockage. Check the water and handle first, then follow your model's needle-cleaning instructions.
Mineral buildup is another possibility, especially if flow became slower before brewing stopped.
How do I unclog a Keurig needle?
Unplug the brewer, let it cool, and follow its manual's instructions for the pod holder and needles. Keep fingers away from sharp points and use only a tool approved for your model.
The Keurig 2.0 Needle Cleaning Tool fits 2.0 brewers only; don't force it into another machine.
Should I descale my Keurig if it won't brew?
Descaling is a reasonable next step when mineral buildup may be restricting flow and the brewer can run the required process. Check water supply and needle clogs first.
If no water moves, don't keep adding cleaner or starting cycles; contact Keurig support for guidance on your specific model.
Why does my Keurig brew only a little coffee?
A partial cup can come from a small cup-size setting, low water, a clogged needle, or mineral buildup. Confirm the selected size and water supply before cleaning.
If your manual allows a water-only rinse, comparing that flow with a pod brew can help narrow down the next check.